How to Perform a Final Drive Inspection?
A final drive is an essential component of heavy machinery used in construction, mining, and other similar industries. Final drives are responsible for delivering the torque and power generated from the engine to the tracks or wheels of the machinery, allowing it to move forward or backward. Like other mechanical components, final drives are subject to wear and tear, and regular inspection is necessary to ensure their proper functioning. In this article, we will guide you through the process of performing a final drive inspection step by step.
1. Check the Oil Level
Checking the oil level is the first step in the final drive inspection process. Oil lubricates the gears and bearings inside the final drive, preventing them from wearing out due to friction. Therefore, it is essential to check the oil level regularly to ensure that the final drive is correctly lubricated. To check the oil level, remove the dipstick from the final drive and inspect the oil level. If the oil level is low, add more oil until it reaches the correct level. It is crucial to use the correct type of oil as specified in the manufacturer’s manual.
2. Inspect the Seals
After checking the oil level, inspect the seals of the final drive. Seals prevent oil from leaking out of the final drive and contaminants from entering it. If the seals are damaged or worn out, oil may leak out, leading to inadequate lubrication, which can cause severe damage to the final drive. Inspect the seals for any cracks, tears, or other signs of damage. If the seals are damaged, replace them immediately with the correct size and type of seal as specified in the manufacturer’s manual.
3. Check for Wear and Tear
The next step is to check for wear and tear on the final drive’s internal components, such as gears, bearings, and shafts. Wear and tear can occur due to metal-to-metal contact, improper lubrication, or other reasons. Inspect the gears for any signs of chipping, pitting, or wear. Inspect the bearings for any signs of damage or excessive play. Inspect the shafts for any signs of bending or misalignment. If any of these components are worn out, damaged, or misaligned, they need to be replaced or repaired.
4. Clean the Final Drive
After inspecting the internal components of the final drive, it is essential to clean the final drive thoroughly to remove any dirt, debris, or metal shavings that may have accumulated inside. Use a suitable cleaning agent and a soft-bristled brush to clean the final drive carefully. Ensure that the final drive is entirely dry before reassembling it.
5. Reassemble the Final Drive
Once you have completed the inspection and cleaning of the final drive, it is time to reassemble it. Make sure to follow the manufacturer’s manual for the correct reassembly procedure. Lubricate the gears and bearings with the recommended type and amount of oil. Tighten all bolts and nuts to the specified torque values. Finally, check the oil level again and adjust it if necessary.
Final Drive Installation Guide
Installing a final drive on heavy machinery requires careful consideration of its compatibility with the machinery’s make and model. Follow the manufacturer’s instructions and guidelines for the correct installation procedure. The following are the general steps for installing a final drive.
- Remove the old final drive from the machinery.
- Clean the installation area thoroughly.
- Inspect the mounting surface for any signs of damage or misalignment.
- Install the new final drive using the manufacturer’s recommended installation procedure and torque values.
- Connect the hydraulic lines to the final drive.
Before operating the machinery, ensure that the final drive is correctly installed and functioning correctly. Any misalignment, damage, or improper installation may cause severe damage to the machinery and result in injuries or fatalities.

Applications of Final Drive
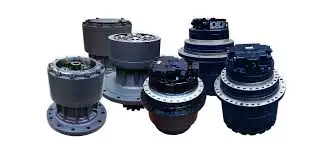
Final drives are widely used in heavy machinery, such as excavators, bulldozers, mining trucks, and other similar equipment. Final drives are typically located at the end of the transmission system and are responsible for transmitting torque and power from the hydraulic pump to the tracks or wheels. They are essential for the proper functioning of heavy machinery, allowing them to move over rough terrain and perform heavy-duty tasks.
Daily Maintenance and Troubleshooting
Regular maintenance and inspections are necessary to ensure that the final drive is functioning correctly and to prevent sudden breakdowns or failures. Here are some essential maintenance and troubleshooting tips for final drives:
- Check the oil level and quality regularly and change it as recommended by the manufacturer.
- Inspect the seals for any signs of damage or wear and replace them if necessary.
- Check for leaks or other signs of oil loss.
- Inspect the gears, bearings, and shafts for any signs of wear and tear or damage.
- Ensure that the final drive is correctly installed and aligned.
- If you notice any issues or abnormalities with the final drive’s functioning, such as excessive noise or vibration, loss of power, or difficulty in moving, stop the machinery immediately and inspect the final drive thoroughly.
By following these maintenance and troubleshooting tips, you can ensure that your final drive is functioning correctly and prolong its lifespan. Regular inspections and maintenance can save you time and money in the long run by preventing severe damage and breakdowns.
If you need help with final drive inspection, installation, or maintenance, our team of experts is here to assist you. Contact us today to learn more about our services and how we can help you keep your machinery running smoothly and efficiently.
Author: Miya