How to Make a Motorized Screw Jack
The motorized screw jack is an essential tool in various industries, providing a practical solution to lifting, pushing, and pulling loads. This article will guide you through the process of creating your very own motorized screw jack, ensuring you understand every step in detail.
Introduction to Motorized Screw Jack
A motorized screw jack, also known as an electric screw jack, uses a motor-driven mechanism to convert rotational motion into linear motion. This linear motion facilitates the lifting, pulling, or pushing of heavy loads. The device offers a compact and reliable solution for moving heavy loads in industries such as construction, manufacturing, and automobile.
Components of a Motorized Screw Jack
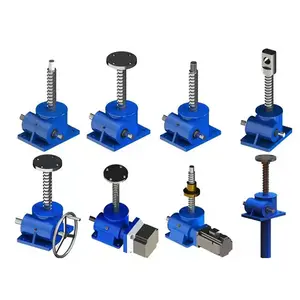
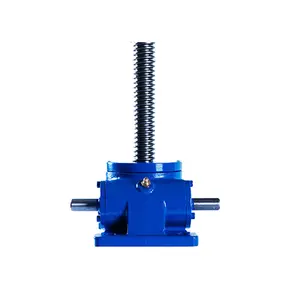
Before delving into the step-by-step process of making a motorized screw jack, it is essential to understand its components. The main parts of a motorized screw jack are the motor, screw, nut, gear, and housing.
- Motor: It provides the power necessary for the screw jack’s operation. The motor can be either an AC or DC motor, depending on the application.
- Screw: This is the central part of the screw jack. It moves up and down when the motor rotates, causing the load to rise or fall.
- Nut: The nut sits on the screw and is designed to move along its length. When the screw turns, the nut moves up or down, depending on the direction of rotation.
- Gear: The gear is connected to the motor and the screw. It transmits the motor’s rotational motion to the screw.
- Housing: The housing encloses all the components, offering protection and durability.
Steps to Make a Motorized Screw Jack
Now that we’ve covered the basics and components of a motorized screw jack, let’s delve into the step-by-step process of creating one.
Step 1: Gathering Materials
The first step in building a motorized screw jack is gathering all necessary materials. Depending on the desired load capacity and size of the screw jack, the requirements may vary. However, the basic materials include a motor, screw, nut, gear, and housing. In addition, you will need tools such as a wrench, screwdriver, and possibly a drill.
Step 2: Assembling the Components
Begin by connecting the gear to the motor. Ensure that the gear is properly secured and can rotate freely. Next, attach the screw to the other end of the gear. The screw should also be able to rotate freely with the gear. Lastly, place the nut on the screw and ensure it can move along the screw’s length.
Step 3: Securing the Components
Once the components are assembled, they need to be secured in the housing. The housing should be sturdy and able to accommodate all the parts. Secure the motor, gear, screw, and nut inside the housing, ensuring they are firmly held in place and can operate smoothly.
Step 4: Testing the Motorized Screw Jack
After assembly, it’s time to test the motorized screw jack. Apply power to the motor and verify that the screw jack operates as expected. The screw should rotate, moving the nut up and down. This movement should be smooth and consistent. If there are any issues, make the necessary adjustments or repairs.
Conclusion
Building a motorized screw jack can be a rewarding experience. It not only provides a deeper understanding of mechanical systems but also equips you with a practical tool for lifting, pushing, and pulling heavy loads. While the process may seem complicated, with a bit of patience and diligence, you can create a functional motorized screw jack that serves your needs.
Remember, safety should always be your priority when working with tools and machinery. Always use protective gear and follow safety procedures. Happy building!