How to Make a Floor to Ceiling Screw Jack
Creating a floor to ceiling screw jack can be a daunting task, especially for those who are not familiar with the technicalities involved. However, the process is not as complicated as it might seem. This guide will explain in detail how to make a floor to ceiling screw jack, demystifying the process and providing you with the knowledge to complete this task with confidence.

Understanding the Basics of a Screw Jack
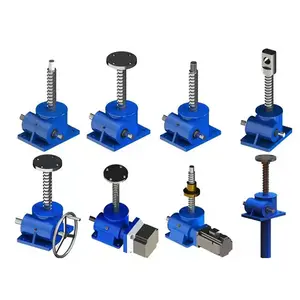
A screw jack, also known as a jack screw, is a mechanical device used to lift heavy objects or apply great forces. It uses the principles of the screw to magnify force, making it an effective tool for a variety of uses, including supporting structures such as floor to ceiling applications.
Materials and Tools Needed
Before we begin, it is important to gather all the necessary materials and tools. This includes a high-quality steel rod, a threaded rod, a base plate, a top plate, nuts, washers, and a turning handle. In terms of tools, you will need a drill, a saw, a wrench set, and safety equipment such as gloves and safety glasses.
Step-by-Step Guide to Making a Floor to Ceiling Screw Jack
Step 1: Preparing the Materials
Begin by cutting the steel rod to the appropriate length, considering the distance between your floor and ceiling. The threaded rod, which will serve as the screw in your jack, should also be cut to the same length. The base plate and top plate will need to be large enough to provide stable support for your jack, but not so large that they obstruct the space.
Step 2: Assembling the Screw Jack
Next, drill a hole through the center of the base plate and top plate. The hole should be large enough to accommodate the threaded rod. Then, thread a nut onto one end of the rod and secure it with a washer. Insert the rod through the hole in the base plate, then slide another washer onto the rod from the top side of the base plate and secure it with a nut. Repeat this process with the top plate.
Step 3: Adding the Turning Handle
The turning handle will allow you to adjust the height of the screw jack. Attach the handle to the top end of the threaded rod, ensuring it is securely fastened.
Step 4: Testing the Screw Jack
Finally, test your screw jack to ensure it operates smoothly. Adjust the height by turning the handle and observe if the top plate moves up and down accordingly. Once you’re satisfied with its operation, your floor to ceiling screw jack is ready to be used.
Safety Precautions
Remember to always prioritize safety when working with tools and heavy materials. Always wear appropriate safety gear, including gloves and safety glasses. Ensure your work area is well-lit and free from obstacles that could cause accidents.
Conclusion
Making a floor to ceiling screw jack may seem like a complex task, but with the right materials, tools, and guidance, it’s a project that can be completed with relative ease. This guide has provided a step-by-step process to help you create your own screw jack, empowering you to take on this task with confidence.
Whether you’re looking to support a structure, lift heavy objects, or simply want to learn a new skill, understanding how to make a floor to ceiling screw jack is a valuable addition to your DIY repertoire.