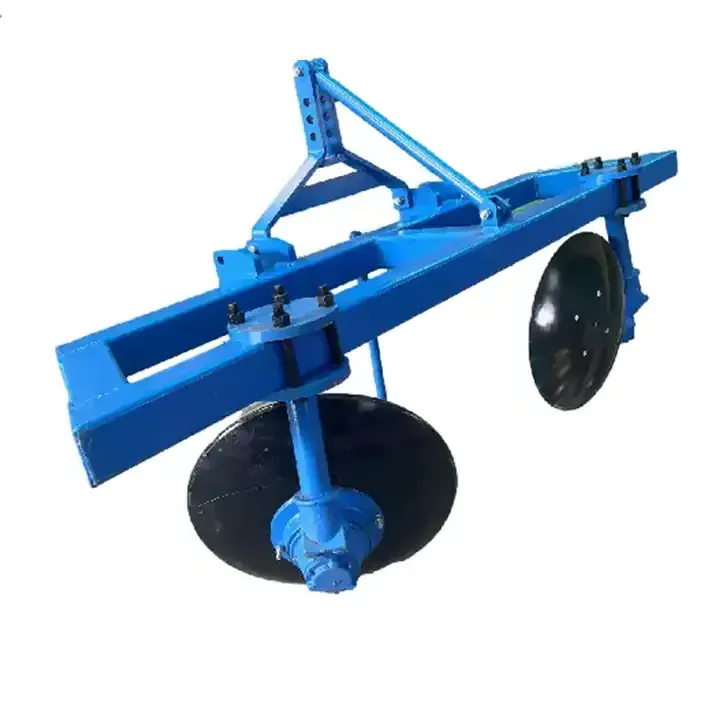
Agricultural Equipment Heavy Duty Disc Ridger for Planting Potatoes
Introduction to Agricultural Equipment Heavy Duty Disc Ridger
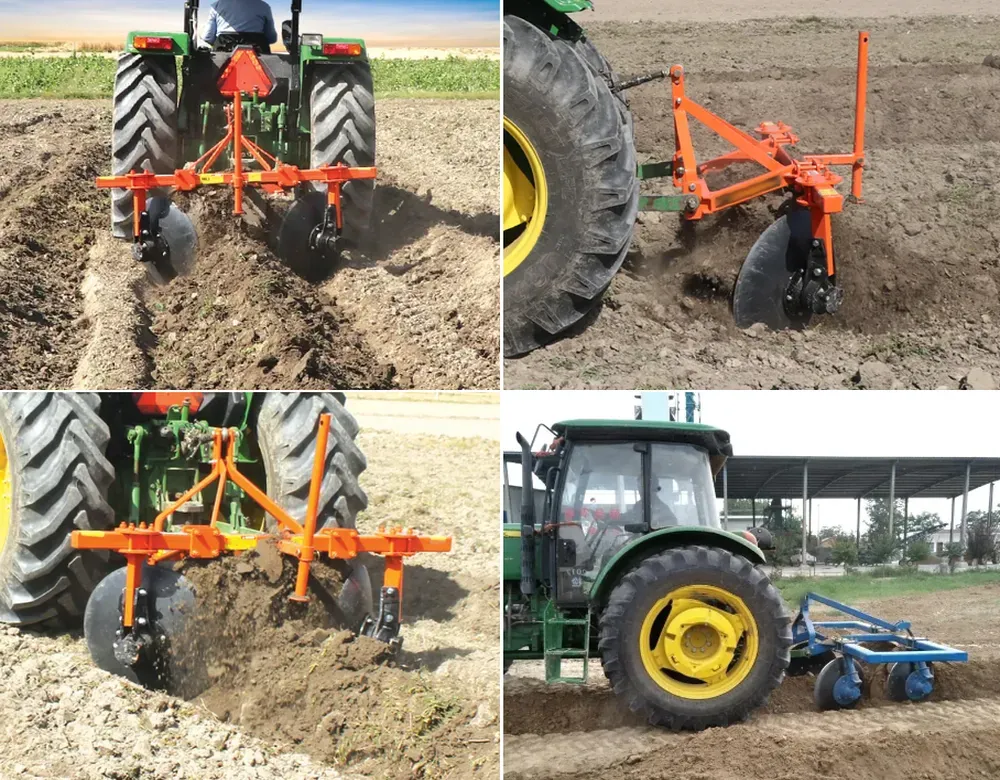
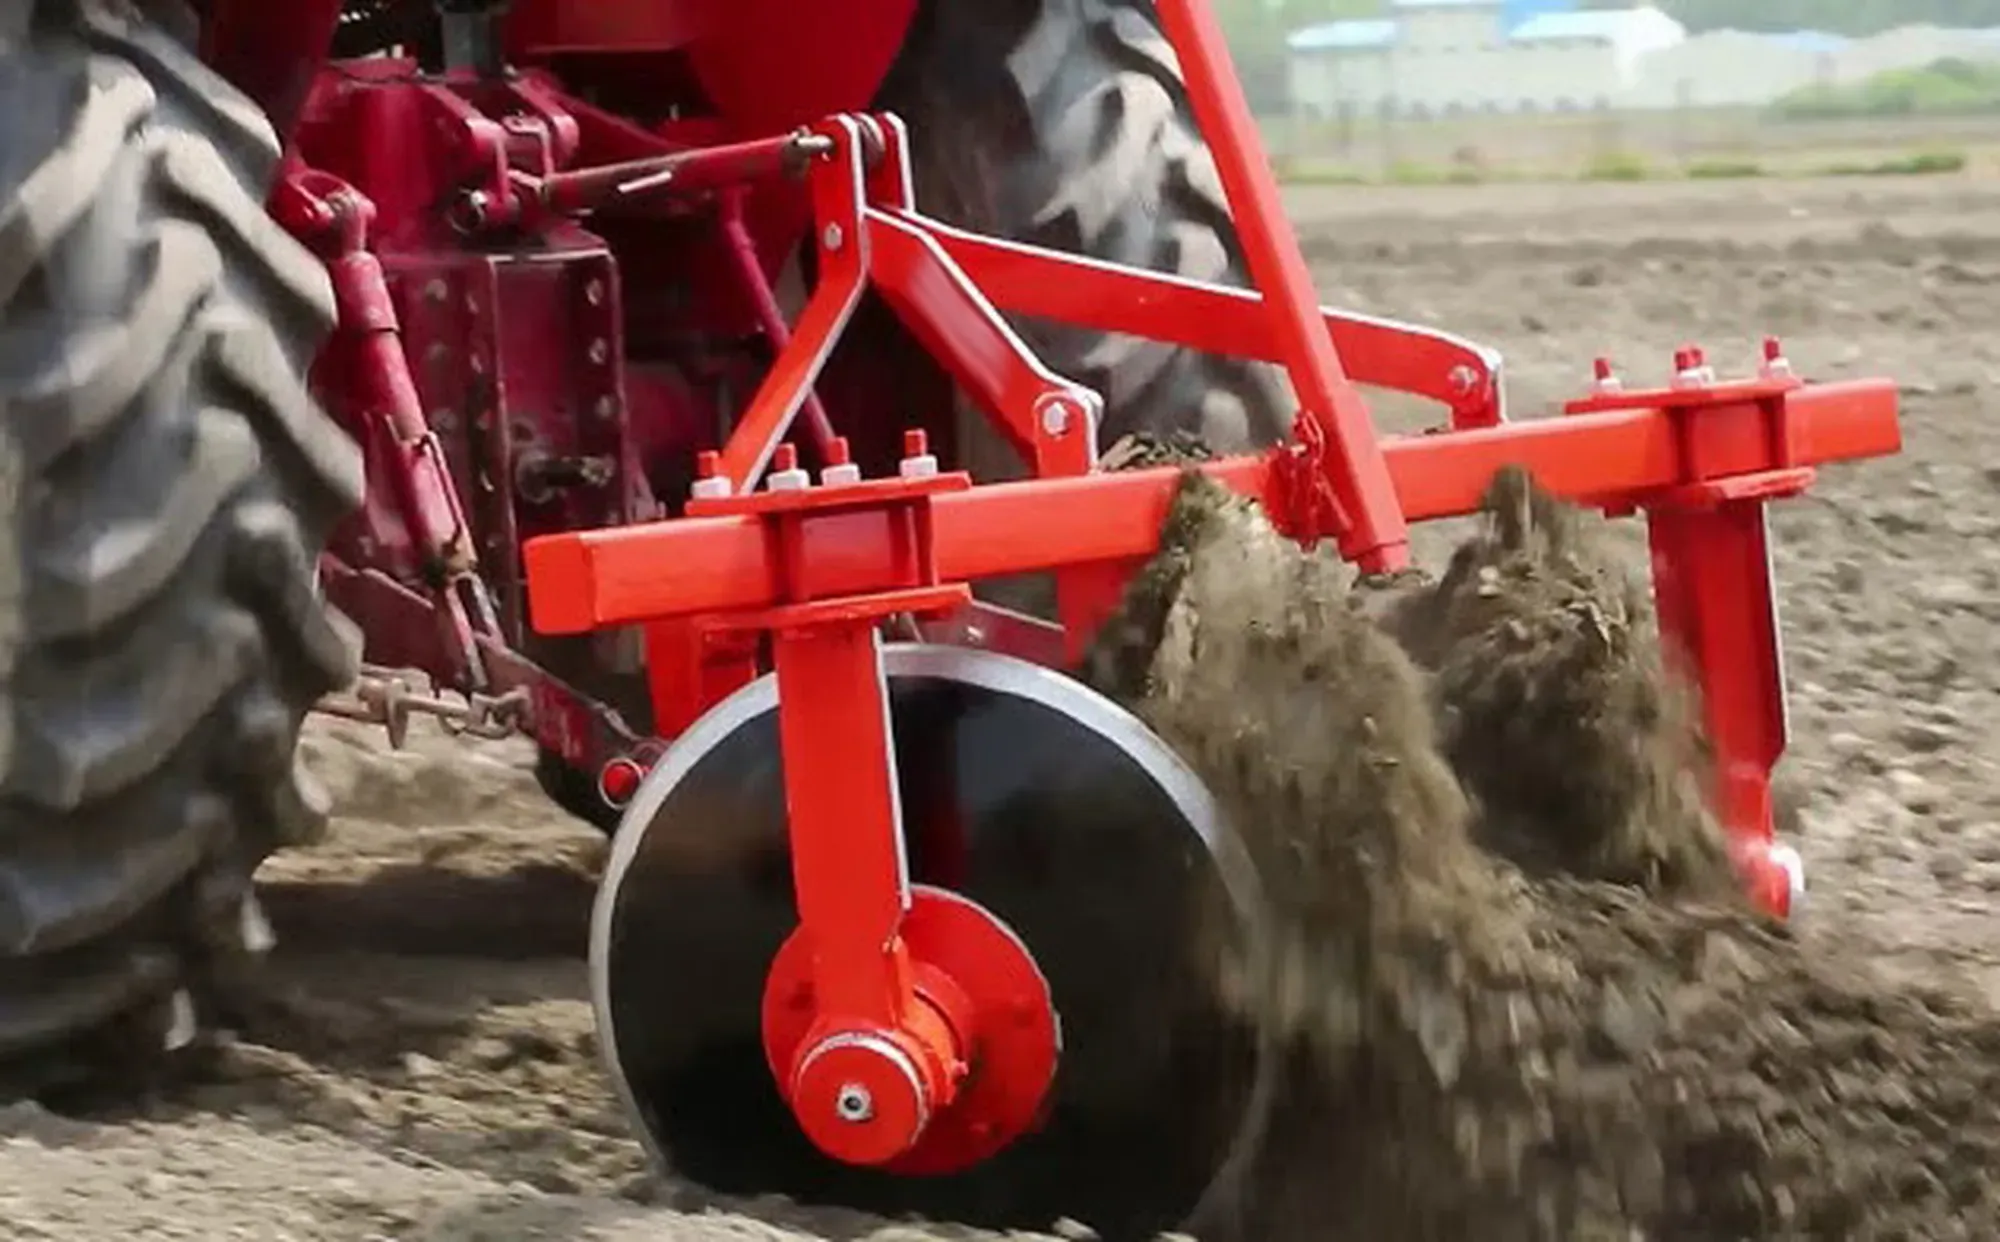
Agricultural Equipment Heavy Duty Disc Ridger is a vital implement used in row crop cultivation to create ridges or furrows in the soil for planting potatoes. This heavy-duty equipment is designed to efficiently prepare the soil for optimal potato growth.
Advantages of Agricultural Equipment Heavy Duty Disc Ridger
Here are the advantages of using Agricultural Equipment Heavy Duty Disc Ridger:
- Efficient Soil Preparation: The disc ridger effectively cuts through the soil, creating ridges that are ideal for planting potatoes.
- Improved Drainage: The ridges formed by the disc ridger enhance soil drainage, preventing waterlogging and promoting healthy potato growth.
- Weed Control: By burying weeds and their seeds, the disc ridger helps in controlling weed growth, reducing competition for nutrients.
- Enhanced Aeration: The soil aeration facilitated by the ridger improves air circulation and root development for thriving potato plants.
- Precision Depth Control: The disc ridger allows for precise adjustment of the depth, ensuring optimal planting conditions for potatoes.
- Durable Construction: Agricultural Equipment Heavy Duty Disc Ridger is built to last, with sturdy components that withstand tough field conditions.
Applications of Agricultural Equipment Heavy Duty Disc Ridger
Here are the applications of Agricultural Equipment Heavy Duty Disc Ridger:
- Row Crop Cultivation: The disc ridger is ideal for creating ridges or furrows for planting various row crops, including potatoes.
- Soil Preparation: It efficiently prepares the soil by cutting through and turning it over, readying it for planting.
- Weed Management: The ridger helps in burying weeds and their seeds, reducing weed competition in the field.
- Improving Drainage: By creating ridges, the ridger enhances soil drainage, preventing water accumulation in the field.
- Precision Planting: The ridger allows for precise depth control, ensuring uniform planting depth for optimal crop growth.
- Enhancing Root Development: The ridges created by the disc ridger promote better root penetration and development for healthier crops.
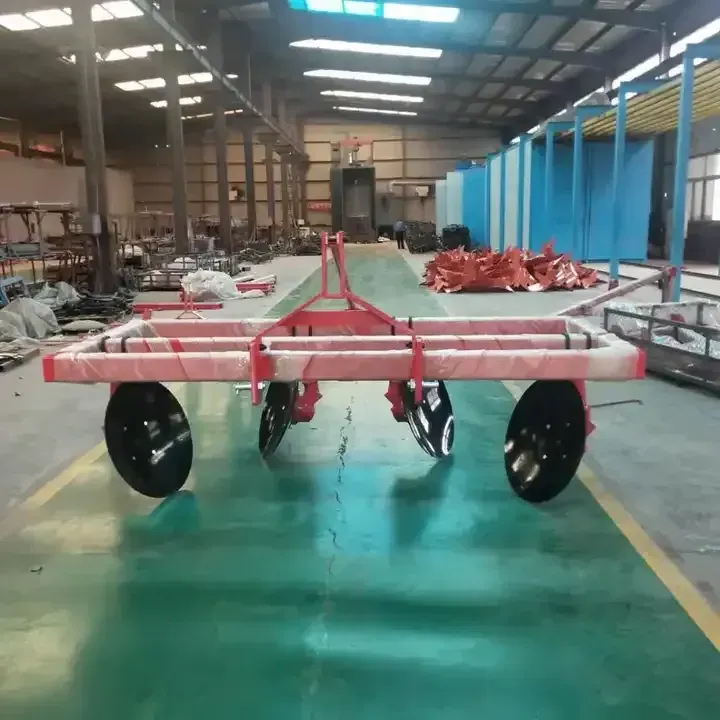
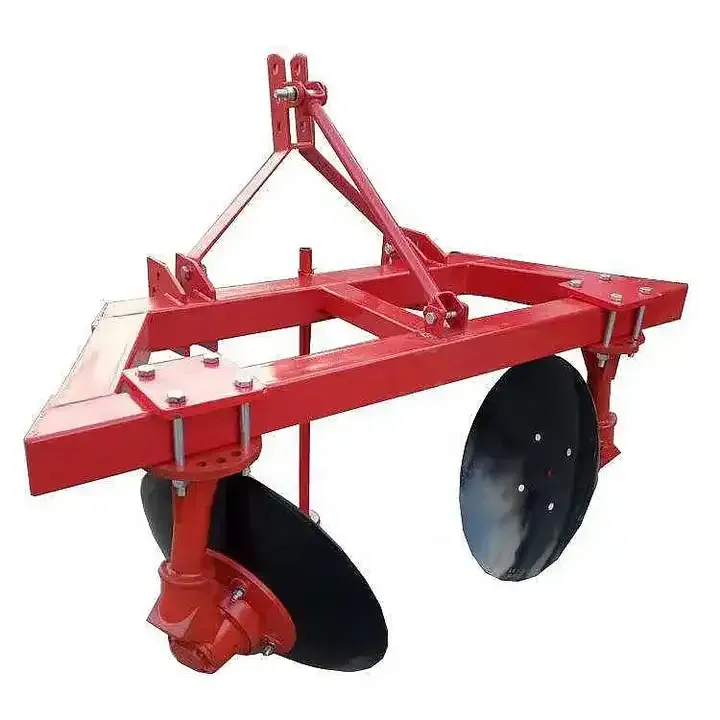
Key Components of Agricultural Equipment Heavy Duty Disc Ridger
A disc ridger consists of several key components that work together to create ridges for row crop cultivation:
- Disc Blades: The primary cutting elements of the ridger made of high-quality steel.
- Frame: Provides structural support and stability during tillage operations.
- Disc Bearings: Ensure smooth rotation of the disc blades for efficient operation.
- Axles: Connect the disc blades to the frame and allow for rotation.
- Scrapers: Remove soil buildup on the discs to maintain cutting ability.
- Depth Control Mechanism: Allows for precise adjustment of the tillage depth.
- Hitching Mechanism: Connects the ridger to the tractor for power transmission.
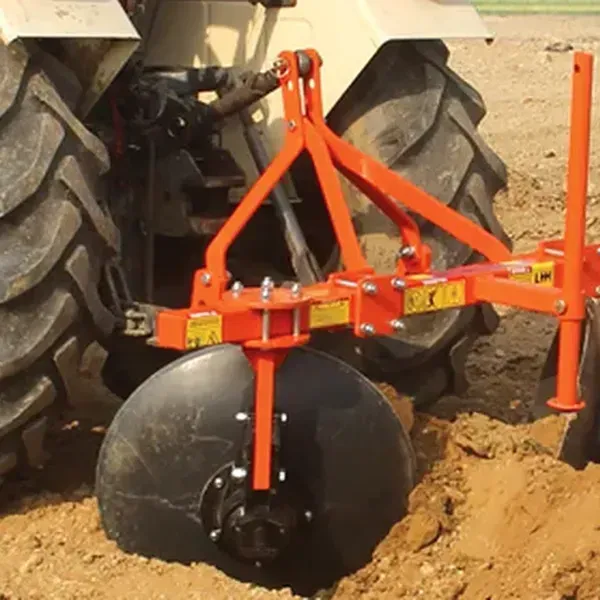
Working Principle of Agricultural Equipment Heavy Duty Disc Ridger
A tractor-mounted disc ridger operates by creating ridges in the soil for row crop cultivation:
- Attachment and Setup: The ridger is attached to the tractor using a three-point hitch system.
- Tractor Movement and Power: The tractor provides the necessary force for the discs to cut through the soil.
- Disc Rotation and Soil Cutting: The rotating discs slice through the soil, lifting it to form ridges.
- Ridge Formation: The discs push the soil outward, creating raised beds for planting.
- Weed Control: The ridger helps in burying weeds and their seeds, reducing weed competition.
- Soil Aeration and Drainage: The ridging process enhances soil aeration and improves drainage.
Installation Steps of Agricultural Equipment Heavy Duty Disc Ridger
Installing a disc ridger involves several key steps for secure attachment to the tractor:
- Position the Tractor: Ensure the tractor is on a flat, stable surface.
- Align the Ridger: Position the ridger behind the tractor and align it with the hitch system.
- Attach Lower Link Arms: Connect the lower link arms for stability.
- Connect Top Link: Attach the top link to maintain proper alignment.
- Check and Tighten Connections: Ensure all connections are secure and tight.
- Test the Setup: Lift the ridger to confirm proper installation before fieldwork.
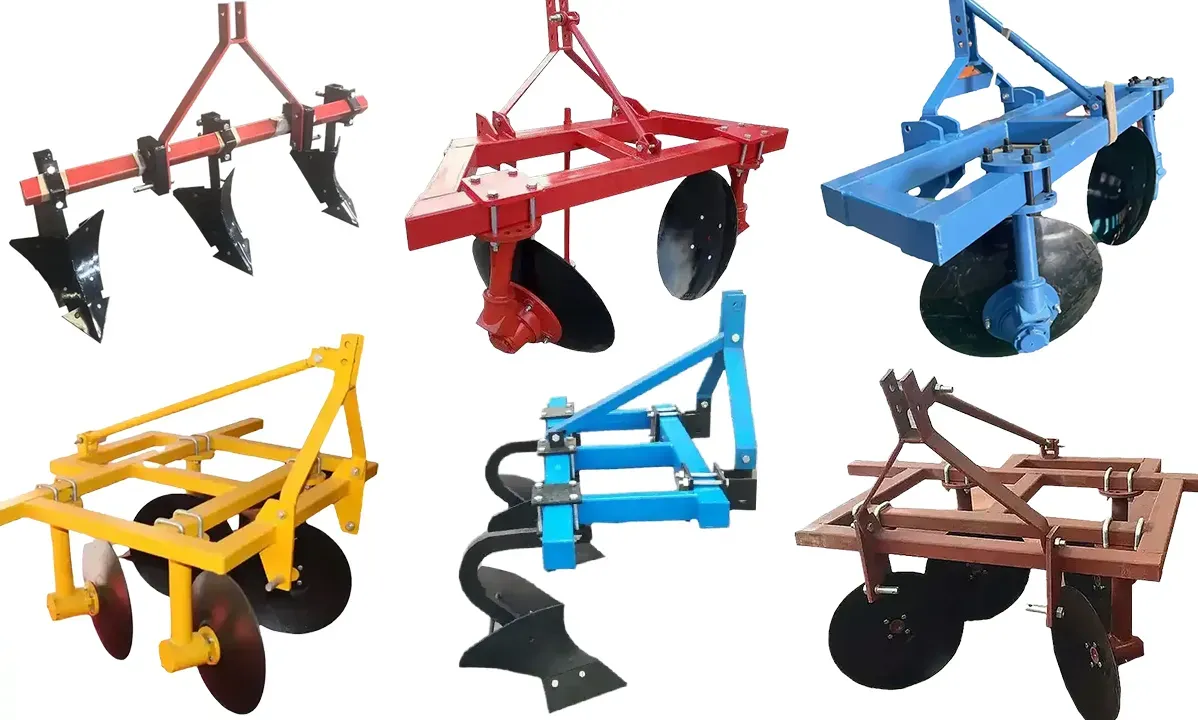
Why Choose EVER-POWER’s Disc Ridgers?
EVER-POWER is a leading manufacturer of disc ridgers, offering high-quality equipment for agricultural operations. Our products stand out due to:
- Professionalism in design and manufacturing processes.
- International certifications ensuring quality and reliability.
- Customized services tailored to specific client requirements.
- State-of-the-art production facilities equipped with advanced technology.
- Exceptional after-sales service and support for customer satisfaction.
- A comprehensive product line catering to diverse agricultural needs.
Author: Yjx